One year, I decided to build the coffin-where the guy is trying to get saying, "lemmeouttahere!".So, I went to Home Depot, bought some MDF particle board, some molding, etc. and built it. It turned out great-but it was heavier than Hell!!!!
Every year it was a big ordeal-I constantly had to get a neighbor or a good friend to help me move it into place.
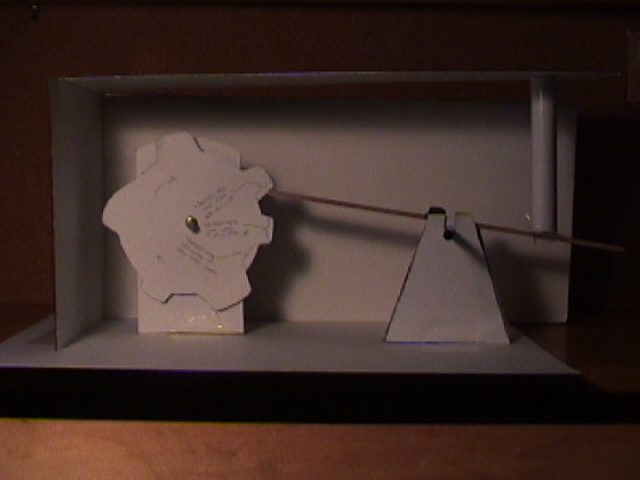
I sculpted the hands. The lid was made from styrofoam. I built a mechanism inside that would open and close the lid. I put it on a folding card table and put a skirt around it and whah-lah! A coffin.
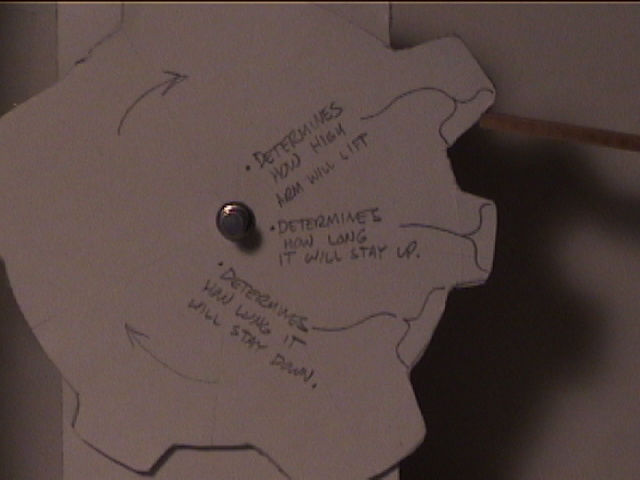
THE MECHANISM:
The mechanism worked great-for about 10 minutes, then the motor burned out, Not enough torque, I guess. Here's basically how I got it to work:


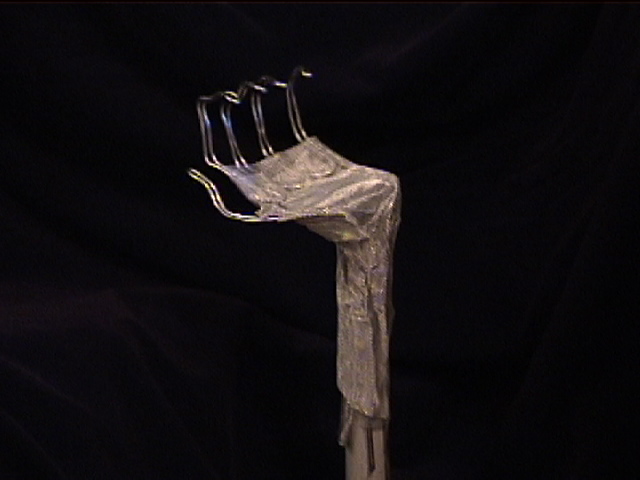
THE HANDS:
I sculpted the hands by first making a wire frame.
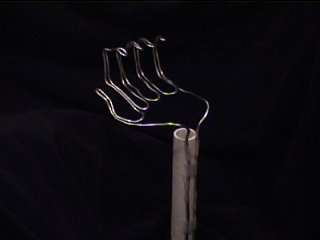
Then I covered it with wire mesh, then foil to create the bulk.


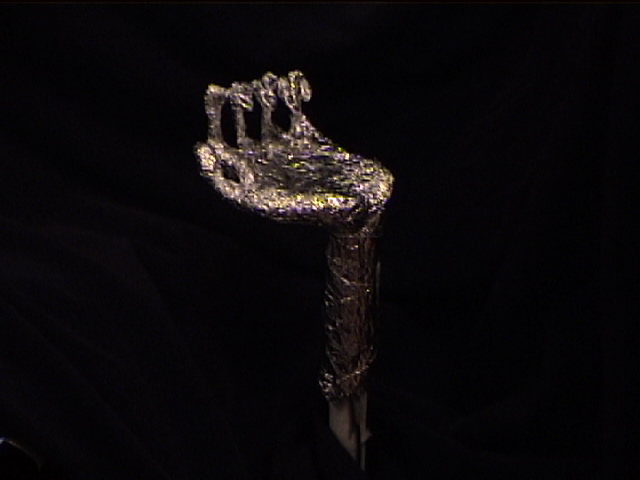
I then covered it with RigidWrap (plastercloth). I then used a product called Das Pronto*(It's an air-hardening modeling clay). The clay graps on to the natural tooth/coarseness of the plastercloth. It has a fast working time. It usually cures within a few minutes but you can keep it pliable by applying a bit of water to it as you work with it (Tip: ofr storage, keep it in a ziploc plastic bag with a few drops of water in it.). It can then be sanded to a smooth finish.
*Das Pronto-the name suggests that it might be a German-Mexican mix. but now, the package just calls it 'DAS'-and it's made in Italy! Go figure...
I drilled a few holes in the styrofoam lid and mounted candlesticks on the top. I left them a bit loose so when the lid rose up and down, the candlsticks would wabble like they were about to fall over. The candlesticks were a wood craft bought froma local craft store (Michael's) and I faux finished it to look like brass, etc. The candles I made by taking plastic pipe and applying hot glue to make it look like the candle was dripping. (But that's for another post.)
So here's the final result: