
Every year it was a big ordeal-I constantly had to get a neighbor or a good friend to help me move it into place.
I sculpted the hands. The lid was made from styrofoam. I built a mechanism inside that would open and close the lid. I put it on a folding card table and put a skirt around it and whah-lah! A coffin.
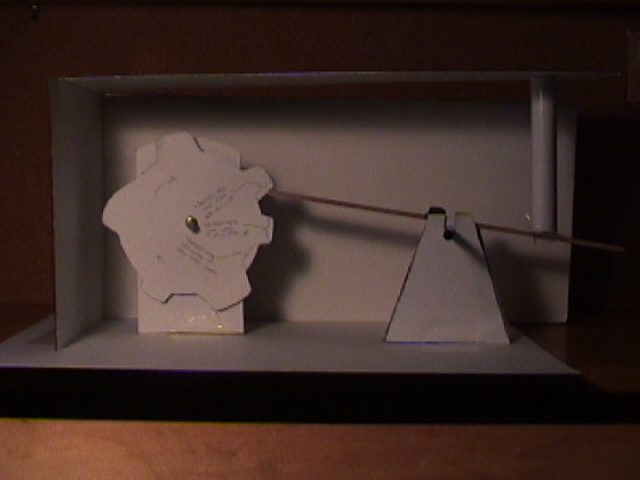
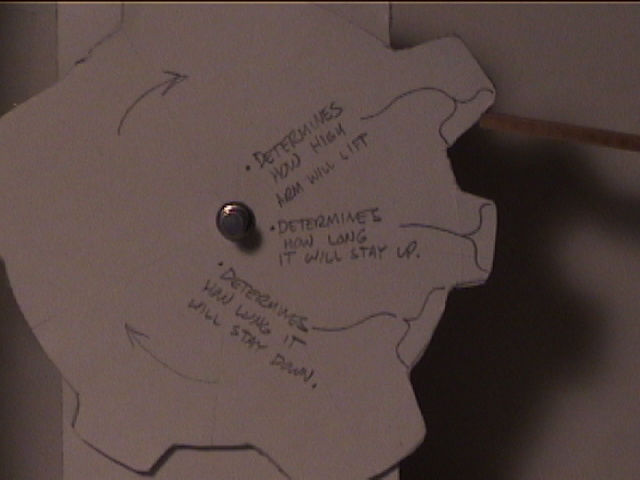
THE MECHANISM:
The mechanism worked great-for about 10 minutes, then the motor burned out, Not enough torque, I guess. Here's basically how I got it to work:
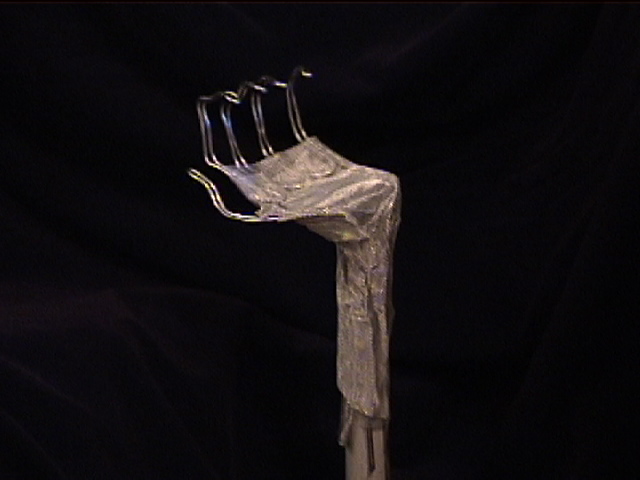
THE HANDS:
I sculpted the hands by first making a wire frame.

Then I covered it with wire mesh, then foil to create the bulk.
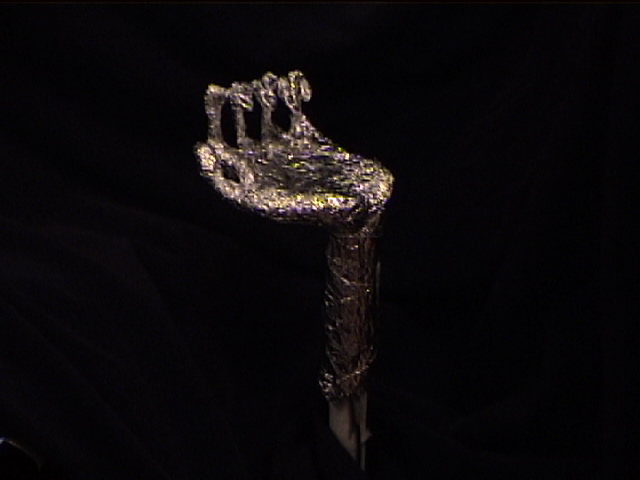
I then covered it with RigidWrap (plastercloth). I then used a product called Das Pronto*(It's an air-hardening modeling clay). The clay graps on to the natural tooth/coarseness of the plastercloth. It has a fast working time. It usually cures within a few minutes but you can keep it pliable by applying a bit of water to it as you work with it (Tip: ofr storage, keep it in a ziploc plastic bag with a few drops of water in it.). It can then be sanded to a smooth finish.
*Das Pronto-the name suggests that it might be a German-Mexican mix. but now, the package just calls it 'DAS'-and it's made in Italy! Go figure...
I drilled a few holes in the styrofoam lid and mounted candlesticks on the top. I left them a bit loose so when the lid rose up and down, the candlsticks would wabble like they were about to fall over. The candlesticks were a wood craft bought froma local craft store (Michael's) and I faux finished it to look like brass, etc. The candles I made by taking plastic pipe and applying hot glue to make it look like the candle was dripping. (But that's for another post.)
So here's the final result:


6 comments:
That has got to be the coolest homemade (with no pattern thingie) thingie I've ever seen!!! I wish I lived next to you. :-)
Truly brilliant. Keep them coming
That's amazing! Did you just whip that up in an afternoon??? Get a few doom buggies and start charging admission ;) Do you decorate every year? We live in La Crescenta... we may just have to wander the hills of Glendale until we find you... (Any hints on the direction we should head??) Thanks so much for the inspiration!!!
Nice! One of my friends pointed me to your site, and I must say it is making me very happy.
Hooray for Halloween! Hooray for home haunters!!!
If you could please spare me just a bit of your creativity I would be so appreciative! Your work is flawless! amazing! Keep up the wonderful work, I've bookmarked your blog and I'll be sure to "Hurry back!"
You might be able to relieve pressure on the motor of your cam if you make the seesaw-looking thing asymmetrical. If the side that touches the cam were longer, it would give more leverage. The cam would have to be bigger though or your up/down motion would decrease.
Your site makes these props seem so easy! Thanks for the inspiration.
Post a Comment