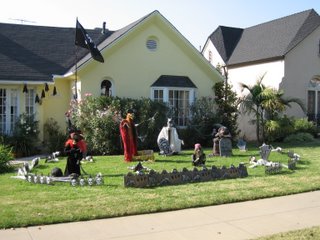
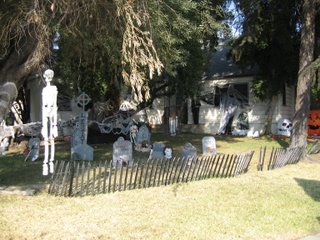
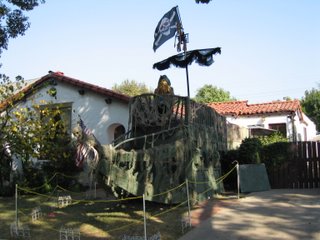
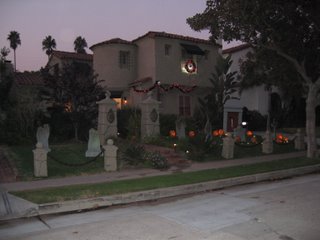
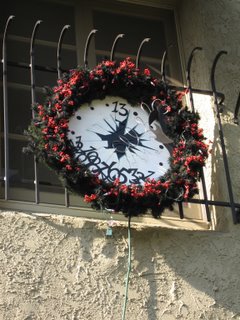
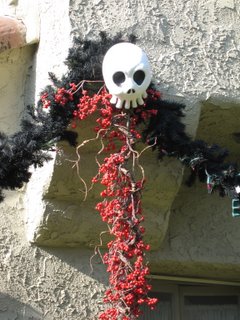
Being Halloween and all, I thought it would be cool to post pictures of homes in my neighborhood that got into the spirit of things.
Literally, keeping up with the Jones'-Davy Jones that is!
And here's my house...
I try and add a little bit every year. New adiitions this year:
HAPPY HALLOWEEN everybody!!!!
Home
▼
Tuesday, October 31, 2006
My Office
When we moved to our new house (and seeing all those HGTV/Extreme Makover:Home Edition shows), I decided that I wanted a Haunted Mansion themed office. So I drew up some concepts of what I wanted it to look like:
I'm not sure how to introduce this so I'll just say it..."Here it is!"
Now...people either say it is the coolest thing they've ever seen or I need professional help.
The green wallpaper with the Lily pattern is actually used in the foyer of the attraction. A company up north in Benicia, CA that makes authentic hand-printed Victorian wallpaper called Bradbury and Bradbury Art Wallpapers (www.bradbury.com) happens to sell it (Dresser Tradition 2-Ashes of Rose Code:LYW Pattern:550 ). The purple/blue wall is a stencil that I made. It is of the wallpaper pattern in the attraction as well. It took a few hours to paint-I still have to paint in all the little pupils in the eyes. The oval mirror is actually a two-way 50/50 mirror. Behind it is a relief sculpture of the Hatchet Goul (to be posted later with an update) that shows through via a light on a timer. The effect is an image that slowly appears and disappears much like the Cheshire Cat in the mirror at the Mad Hatter Shop at Disneyland.
I was looking in a lighting shop in Hollywood (LAMF 660 N. LaBrea Ave. Los Angeles, CA 90036 323-932-6000) for a 5-light wall sconce and but by chance, I happened to find the wall sconce of a Griifin/gargoyle that is the exact same one that is in the attraction that is located by the staring statues, just before you get onto the Doombuggy.
(I'll post more pictures and details later).
The Bat in the Birdcage
"She's only a bird in a gilded cage..."
One of my favorite unused concepts from 'The Haunted Mansion' was this one by the late Legendary Disney animator, Marc Davis...
(I hope one day they might decide to put this in the attraction.)
I was so inspired by this piece that I decided to make it. I sculpted the bat in Sculpey and made a mold and hollow cast of it so I could fit a battery pack connected to two LED lights (for the eyes). I also sculpted the bones. At first, I was going to actually going to construct a cage but I thought to look for one in a pet store that I could use. Originally, I had sculpted the base with the ornate flange holding up the cage but-it fell and broke. Typical. Anyways, this is how it turned out:
One year, we had a huge Halloween party and I invited Alice Davis (Marc Davis' wife) to the party. I was proud to show it to her. She LOVED it! Although...she had one thing to say about it and that was I had forgotten Marc's favorite thing about this concept-and that was the blood in the water trough! Oh, well.
Monday, October 16, 2006
The Coffin
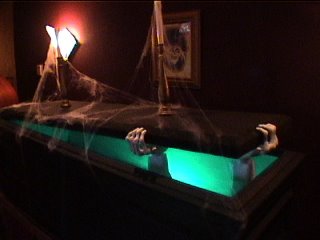
One year, I decided to build the coffin-where the guy is trying to get saying, "lemmeouttahere!".So, I went to Home Depot, bought some MDF particle board, some molding, etc. and built it. It turned out great-but it was heavier than Hell!!!!
Every year it was a big ordeal-I constantly had to get a neighbor or a good friend to help me move it into place.
I sculpted the hands. The lid was made from styrofoam. I built a mechanism inside that would open and close the lid. I put it on a folding card table and put a skirt around it and whah-lah! A coffin.
THE MECHANISM:
The mechanism worked great-for about 10 minutes, then the motor burned out, Not enough torque, I guess. Here's basically how I got it to work:
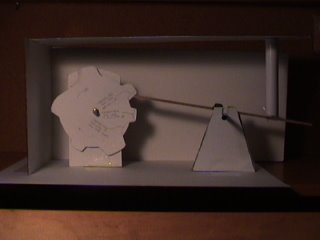
THE HANDS:
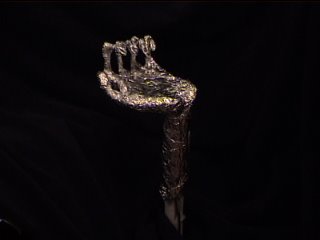
I sculpted the hands by first making a wire frame.
Then I covered it with wire mesh, then foil to create the bulk.
I then covered it with RigidWrap (plastercloth). I then used a product called Das Pronto*(It's an air-hardening modeling clay). The clay graps on to the natural tooth/coarseness of the plastercloth. It has a fast working time. It usually cures within a few minutes but you can keep it pliable by applying a bit of water to it as you work with it (Tip: ofr storage, keep it in a ziploc plastic bag with a few drops of water in it.). It can then be sanded to a smooth finish.
*Das Pronto-the name suggests that it might be a German-Mexican mix. but now, the package just calls it 'DAS'-and it's made in Italy! Go figure...
I drilled a few holes in the styrofoam lid and mounted candlesticks on the top. I left them a bit loose so when the lid rose up and down, the candlsticks would wabble like they were about to fall over. The candlesticks were a wood craft bought froma local craft store (Michael's) and I faux finished it to look like brass, etc. The candles I made by taking plastic pipe and applying hot glue to make it look like the candle was dripping. (But that's for another post.)
So here's the final result:
Every year it was a big ordeal-I constantly had to get a neighbor or a good friend to help me move it into place.
I sculpted the hands. The lid was made from styrofoam. I built a mechanism inside that would open and close the lid. I put it on a folding card table and put a skirt around it and whah-lah! A coffin.
THE MECHANISM:
The mechanism worked great-for about 10 minutes, then the motor burned out, Not enough torque, I guess. Here's basically how I got it to work:
THE HANDS:
I sculpted the hands by first making a wire frame.
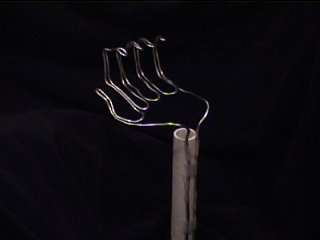
Then I covered it with wire mesh, then foil to create the bulk.
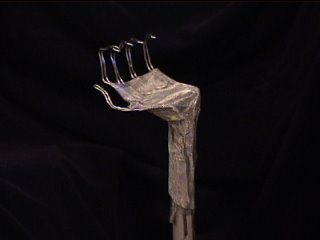
I then covered it with RigidWrap (plastercloth). I then used a product called Das Pronto*(It's an air-hardening modeling clay). The clay graps on to the natural tooth/coarseness of the plastercloth. It has a fast working time. It usually cures within a few minutes but you can keep it pliable by applying a bit of water to it as you work with it (Tip: ofr storage, keep it in a ziploc plastic bag with a few drops of water in it.). It can then be sanded to a smooth finish.
*Das Pronto-the name suggests that it might be a German-Mexican mix. but now, the package just calls it 'DAS'-and it's made in Italy! Go figure...
I drilled a few holes in the styrofoam lid and mounted candlesticks on the top. I left them a bit loose so when the lid rose up and down, the candlsticks would wabble like they were about to fall over. The candlesticks were a wood craft bought froma local craft store (Michael's) and I faux finished it to look like brass, etc. The candles I made by taking plastic pipe and applying hot glue to make it look like the candle was dripping. (But that's for another post.)
So here's the final result: